Please contact IBM if you require support.
Follow the instructions on this page to install Textbox.io for IBM WCM.
Important
This application must be installed on the same WebSphere Application Server as WCM. Be sure to assign all modules to the correct server in the Manage Modules page.
Installation steps
- Log into your WebSphere Application Server Console (e.g. https://server:port/ibm/console/).
- Click "Applications" > "Application Types" > "WebSphere enterprise applications"
- Click "Install"
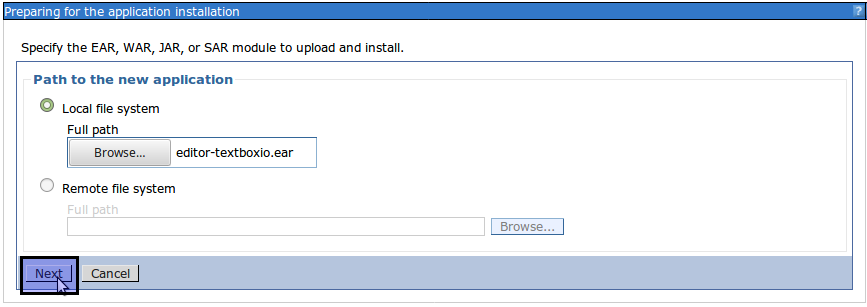
- Provide path to "editor-textboxio.ear" and click "Next".
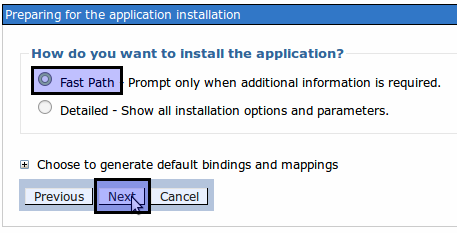
- Select "Fast Path" and click "Next".
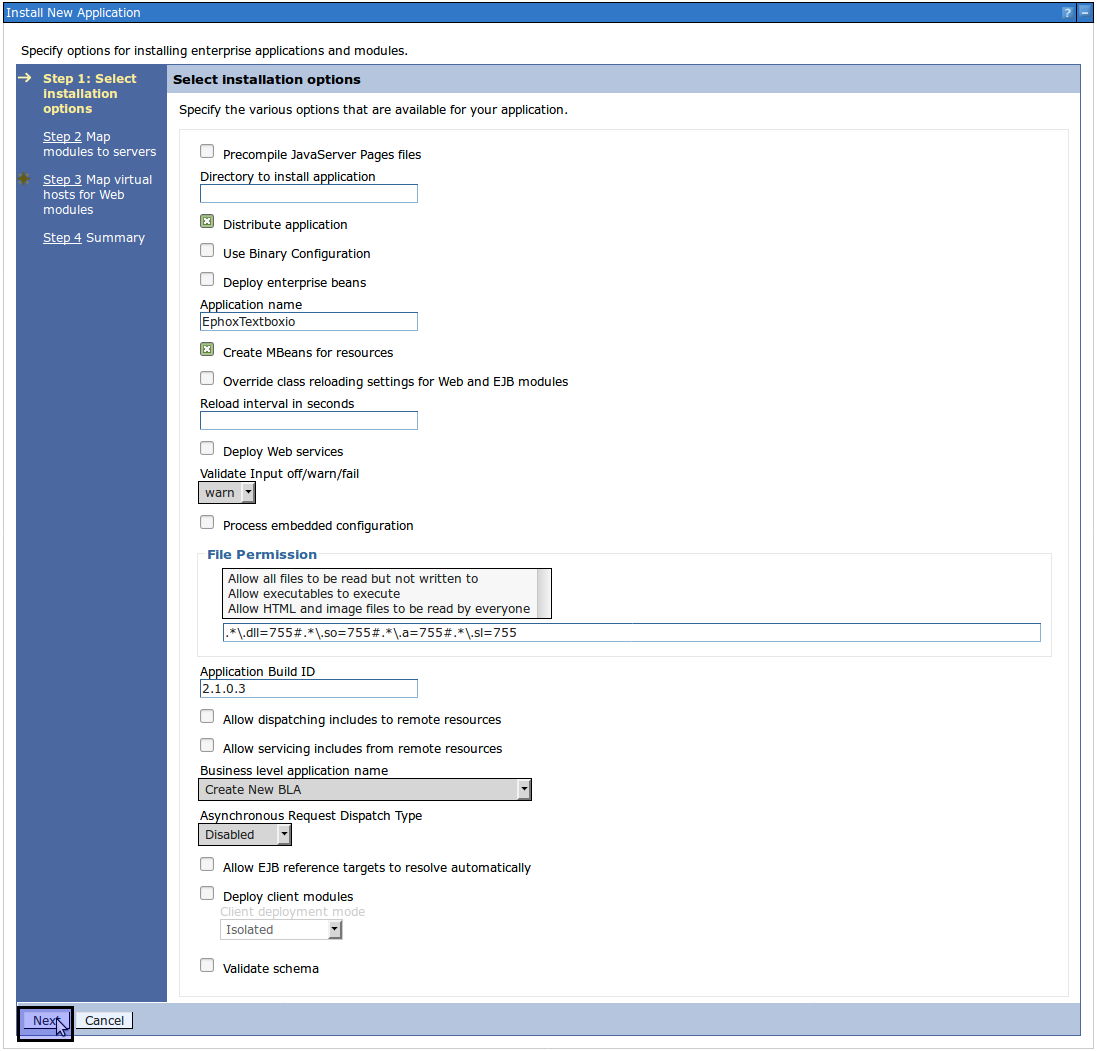
- Keep the default installation options and click "Next".
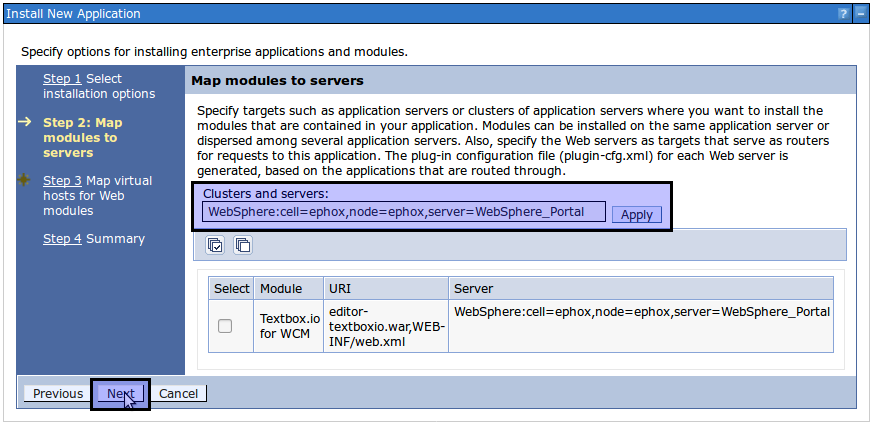
- Make sure that the modules are deployed to the server running WebSphere Portal. Typically this will be the server called "WebSphere_Portal". If this server does not appear in the list, it may not have been started yet.
To ensure that the ear is deployed to the right location, you will need to select the server, select the module, and then click "Apply".
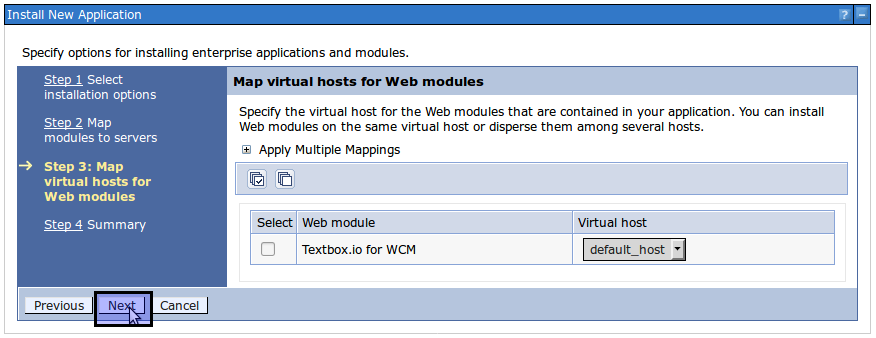
Once the module is mapped to the correct server, click "Next". - No action is required for mapping virtual hosts for Web modules. Click "Next".
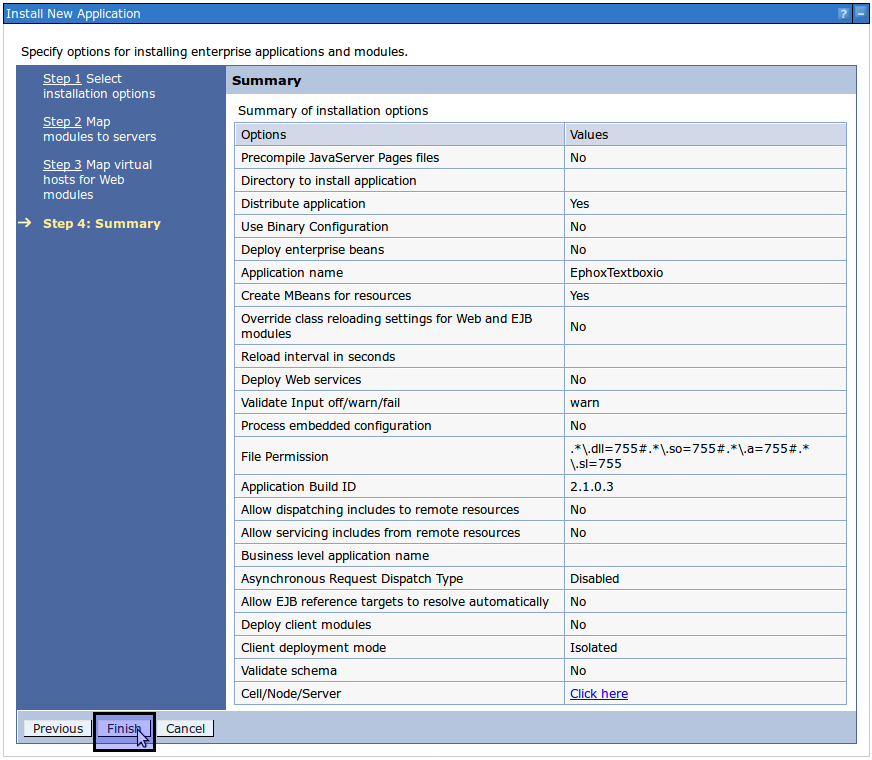
- You will be presented with a summary of installation options. Click "Finish" to install the application.
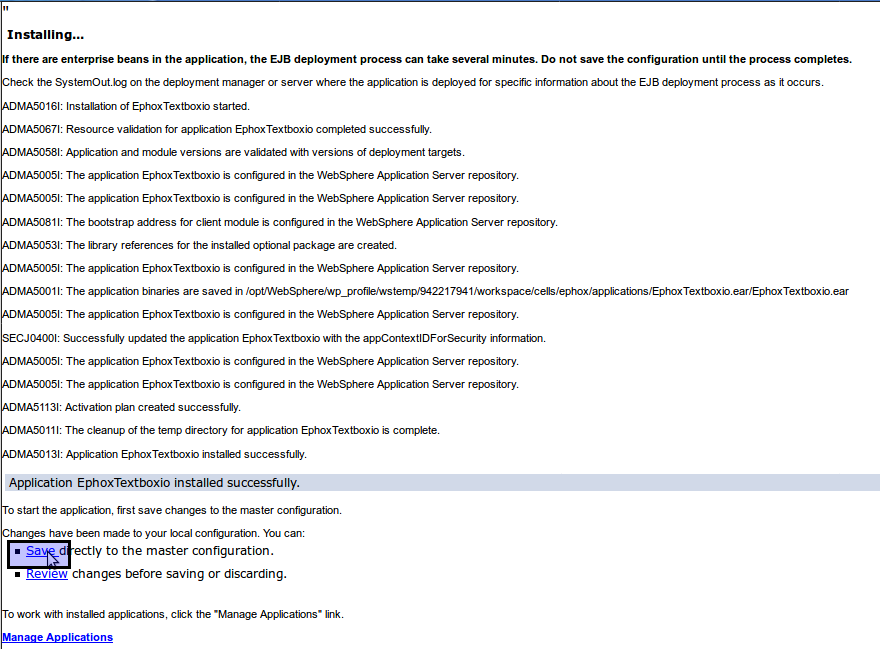
- When the installation is finished you will need to save the changes to the configuration. Click "Save".
- To be able to use the application, it needs to be started first. Select "EphoxTextboxio" and click "Start"
Attachments:
Edit Shared Settings.png (image/png)
Configure.png (image/png)
Preferences.png (image/png)
Start application.png (image/png)
Select TextboxioForWCM.png (image/png)
WebSphere enterprise applications.png (image/png)
Installing.png (image/png)
Summary.png (image/png)
Map virtual hosts.png (image/png)
Map modules to server.png (image/png)
Installation options.png (image/png)
Fast Path.png (image/png)
Choose File.png (image/png)
New Enterprise Application.png (image/png)
New Application.png (image/png)
Install_services0.png (image/png)
Install_Tbio1.png (image/png)
Install_Tbio2.png (image/png)
Install_services3.png (image/png)
Install_services4.png (image/png)
Install_services5.png (image/png)
Install_services6.png (image/png)
Install_services7.png (image/png)
Install_services8.png (image/png)
Install_Tbio9.png (image/png)
Install_Tbio4.png (image/png)
Install_Tbio5.png (image/png)
Install_Tbio6.png (image/png)
Install_Tbio7.png (image/png)
Install_Tbio8.png (image/png)